Friday, July 30, 2010
Been a'while
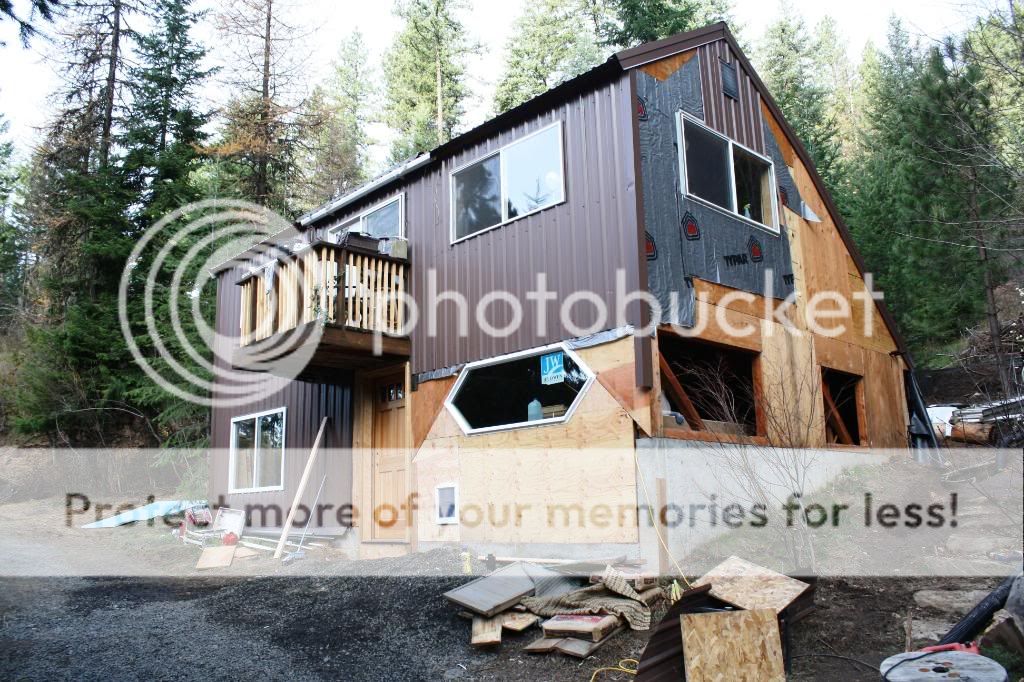
Since last go-round, we completed our project up in Moscow, ID and are pleased to announce that we are still the 100% owners of 22 acres in the foothills of Moscow Mountain that boast off-the-grid homes. Pretty rad.
Unfortunately, the economy hit us like it hit everyone else and work pulled us back south. So we're enduring 100 degree summers instead of -11 degree winters, and doing it all-over again, kind of.
Take what we did it Moscow, mash it up a bit, and here we find ourselves, taking what we learned and what we now hold near and dear to hearts, and making it more "traditional." And by that, I mean less intimidating.
Off-the-Grid livin' ain't for everyone, that's for sure, but it works and it feels good. Being back in a place that allows me to run the shower for hours on end or use a microwave or hell, crank the ac down to 30 degrees and pretend I'm back on the hill, isn't the same as it was before we began our off-the-grid adventures almost 2-years ago. Living off-the-grid has permanently affected us so now, in reflection, I want to share what I learned and how I'm making the transition back to 'normal' living. Although, normal is relative...
Sunday, July 26, 2009
Rain, rain
Currently, we do not have a gutter across the front roof line so I try to keep plants along the edge. This helps keep them watered not only during rainstorms but they also collect the dew off the roof in the morning. I also flip that large metal bin; it's also along the edge of the roof line and collects water easily. There's a hose nozzle in the bottom corner so I can easily get the water; often I don't bother and stand the plants in the container so the roots can absorb the amount of water they need. This is a simple way to avoid over-watering. I have several containers similar (in look and function) to this vicariously placed around the house and garden.
We're still experimenting with ways to help keep dirt and leaves out of the gutter so at the beginning of a storm, or before if we're lucky, one of us will run outside and clear the gutters. Any suggestions on how best to block out he leaves and dirt but still collect maximum water?
I'm planning on measuring out some screen and fitting that along the gutter but I will also have to clear that - though it'll be easier. Any more ideas out there I could steal?A couple more ways we save water - the well and the solar shower, which we use during the summer.
The shower is all salvaged wood. When we first purchased the property, this was our only shower but the road wasn't there so it was also blocked by some thick foliage and trees. The well is the black tube.
Tuesday, July 14, 2009
When the creek runs dry....
First we monitored what was already in place; A 500 gallon tank holds water for the pond cabin, feeding a gravity based plumbing system. Translation – the tank sits uphill from the cabin; instead of putting in pumps, the water just naturally flows downhill into the holding tank and then into the actual plumbing. Doesn’t make for greatest water pressure, but is a very simple system that works.
For this loft cabin with a composting toilet, the 500 gallon tank isn’t quite enough during our driest months (August, September, October) so we knew that we’d need bigger tanks for the second cabin where we would be living primarily.
And bigger we got…
Two 1750 gallon water tanks that we needed to be bury an estimated 5 feet below ground to avoid freezing.
We put these tanks directly behind the road cabin, again utilizing gravity to increase the amount of water pressure and reduce the demand on a water pump. You’ll notice in the images we are using a backhoe to put this specific tank in place – very helpful when lifting 700+pounds but we dug out the holes by hand and placed the first tank by hand with the help of a few close friends – THANK YOU! (I missed the photo-ops for those as I was at work but I hear it was pretty tricky.)
Once we had the tanks in their rightful places, we began burying. We connected the tanks with an easy siphoning system so as one tanks water level decreases, it automatically siphons water from the other. This keeps the primary tank full and allows the secondary tank to collect the rain water off of our roof.
We’ve set-up a gutter on one side of our roof that gathers all of our rain water, immediately feeding it into the secondary tank where it is stored.
While experimenting with our tanks, we also tapped a spring located directly behind the house that now fills a well; we dug a 10 foot deep hole, filling the bottom 3 feet with gravel of varying sizes. The well level varies depending on the season and the weather but this allows us to fill the secondary tank easily, again siphoning the water from the well into the tank.
Now with these two tanks in place, we alleviated some of our concerns and were able to bathe freely! Showers are glorious! But we still hadn’t combated the garden.
While the creek is running, we simply tap the creek and water the garden out of a holding pond that collects to overflow from our tanks and our micro-hydro system but with the creek dry…we’ve begun to realize how quickly plants dry out. A rain storm came through a couple of days ago and renewed our hope in the garden but again, we are reduced to hand watering the healthier of the plants. Not ideal but while we keeping exploring ideas, it seems to be our best option.
Any suggestions out there? We’ve thought about just randomly placing rainwater tanks around the yard and using those as we can, I’ve actually vicariously placed a few large containers throughout the garden when rain is in the forecast, just in case, but still not sure what our best option is…
Check back to find out the difference between indoor shower vs. outdoor shower (another way we save water) and a composting toilet vs. a dual flush, energy star toilet. What’s easier? What’s the most effective? What’s the smelliest?
Peace,
B’Bellie
Monday, July 13, 2009
Keep 'er Cool
However, upon my return I was pleasantly surprised to find out that summer had finally arrived! And all the complications that go along with maintaining an off-the-grid house were in full-swing. Big concern: cooling the place.
Let me start by mentioning that I am originally from a region of the world where AC is a must-have! There is absolutely no possible way one will survive an August day in the deep south without it unless they are prepared to smother themselves alive between the heat and humidity, often pushing the heat index to well above 100 degrees. To suddenly live in a world where central AC is a commodity is one thing, but to be thrust into a world where AC isn’t an option, has been quite an adjustment. It’s strange to reminisce how use to the humming of an AC unit or a ceiling fan I’d become…
Our house appears on a south-facing slope so during the winter, we enjoy the luxury of the mid-afternoon sun heating up what the wood fire hasn’t already taken care of but in the summer, it gets a bit toasty. The first floor is buried into the side of the hill so we incur mild ranges in temperatures on the first floor, where the kitchen, living room, laundry room and bathroom are situated. The second floor, however, bears the brunt of the sun and can heat up pretty quickly! On both floors we’ve taken a passive approach primarily, having the windows situated on opposing sides of the floor plan, creating a nice cross draft. Often times, this is plenty of cross-ventilation for downstairs but on really warm days, we will use an old wall-mount fan that rotates through the open floor plan, creating a gentle breeze. It's not exactly energy star rated but in the world of "green" I think reusing counts just as much.
On the second floor, a warm afternoon outside can turn into a smoldering hotbox inside. Sometimes the cool breezes just aren’t enough so we are in the process of purchasing and installing some sun shades, which are currently on-sale at JCPenny. In theory, these shades will reduce the sun’s glare and UV rays reflected onto the house by an estimated 66%. (Again, we are in the process of trying these so no word on if they are effective or not.) The shades are transparent so you can still enjoy the scenery but hopefully, from a cooler window. The specific shades I am looking at are item # K736-6177, which I would use on the interior of my windows but there are also exterior, heavy duty options available. All the exterior shades that I have seen tend to be opaque and resemble a vinyl material but I have also seen bamboo and various knitted versions. The exterior shades tend to block UV rays by an estimated 20% increase to the interior shades, varying depending on the material used.
We’ve also considered trying an attic fan; the primary issues we have with the attic fan is it requires a certain depth to your roof (including the ceiling, installation and roof) which we do not have. They are tube like devices and I hear, pretty easy to install. A solar panel sits on your roof above the fan, powering it directly. Another concern that we have with the solar fan is placing panels directly onto our roof with snow being such a significant problem during the winter months – we’re unable to get up on our roof and clear the snow. A website to check out to find out a bit more information about solar attic fans is: http://www.solaratticfans.com/. I have done minimal exploration on this site and can only provide you with very basic details of how a solar fan should work if you’re interested.
I have found that using curtains year-round really reduces the indoor temperature range, making a HUGE difference during winter. We keep drapes on all our windows during the winter and in the summer months I switch to lighter weight curtains; when we’re not home or not in a specific room, we pull the drapes/curtains to help insulate. We’ve picked up second-hand drapes/curtains along the way and I hope to, or recruit some of my more sewing savvy friends, to make some that match for the house in preparation for winter.
That’s all for now!
Check back to found out how we’re combating another summer dilemma - drought!
Peace,
B’Bellie
Monday, January 26, 2009
MONEY SAVER - Using stuff in your kitchen to clean with
So you're probably thinking, "your house doesn't smell like dogs anymore, it smiles like a salad." But no, it's not true. Once the vinegar has dried, it leaves no scent and if you do want a scent, you can add a few of those concentrated scent drops available at your local co-op or health food store.
Another kitchen item that's really useful is Apple Cider Vinegar. When I was still down at LSU my old roomies and I discovered some of the perks of ACV including that it is a metabolism booster (one tablespoon a day is supposed to increase your metabolism) and helps soften your dogs coat as well as prevent the pesky flea.
Oh and while we are on the subject of fleas...try Borax or Moth Balls. I used moth balls when I vacuum to not only help with the neutralizing odors but also to kill all those determine flea eggs. I just put a couple of moth balls in my vacuum and remove them when I'm done. And Borax is another one of those miracle household items that you can kill fleas with, scrub your counters and your floors with, and drop it in your laundry to boost the colors and reduce static.
All of these items can be found at your neighborhood grocery.
Peace out,
B'Belli
Tuesday, January 20, 2009
Ascending 6 inches sheet of ice

They're called ice cleats, and to be honest, I feel like I could walk up the side of an ice burg in these things.
However, winter roads don't just present the issue of ice. Sometime we've got snow too so that's when I turn to these lil' guys:

The Cadillac of snow shoes if you will; these MSR Lightning Ascent 25 snowshoes have turned out to be a TRUE life saver! I purchased them after explaining that not only would I be experiencing my first Idaho winter, but my first real winter in general.
So far so good! I'll keep y'all posted about how well these winter tools continue to work!
Peace out,
B'Belli
Before and After Pictures - the first of many
Monday, January 5, 2009
What's All this Blogging Business About?

It's an areal view of the property. In the bottom corner is the "Lake House" and up the road is the "Road House."
PEACE
Friday, September 12, 2008
Just Thinkin'
Up and Up and Up it Goes
What I'm currently most proud of, we have completed our garden area. Remember these pictures:
These photos were snapped the day after we purchased the property for insurance purposes. The area we selected was a natural choice; it is on a south/south west facing slope directly in front of the "Road House" and a short distance from the "Lake House." The previous owner had attempted a garden here but was only living here six months a year so it was quickly over grown and enjoyed by the various wildlife in the area.
After choosing our location, the next big question was, "how are we going to develop this land into enough usable space for a garden that would provide both of us with enough fruits and vegetables during the summer months to avoid having to purchase any?" The answer: build a retaining rock wall, filling in the sloped area with a clay/top soil mixture.
And so we began hauling rocks from local, family owned property every Friday, Saturday, Sunday for about a month. We brought two trucks with us for each haul, an old flatbed Ford and a Toyota Tacoma, filling both to the top. (I'd estimate we probably hauled at least 20 full loads.)
Slowly but surely, we began to see a difference:
It wasn't until we had some visitors that we realized we were DONE! And man, it is pretty spectacular what we accomplished:
Look at it! I can't believe we did that!Now that the retaining wall is completed, we are prepping the soil for a long, hard winter with the hopes of having beautiful "black gold" soil some spring. How are we doing this?
I already mentioned that we used a clay/top soil combo in flattening out the garden area. On top of this, we are adding a 2:1 mixture of top soil and compost that will be mixed as we add it to the garden. We will also add some peat moss and lime (as needed) then we will plant our cover crop. And then hopefully, by March, our soil will be wonderful and ready for planting some veggies!
But what does all of this do to the soil?
Peat Moss - is lighter, fluffier, more pulverise than regular soil. By adding this to your garden soil, you create a different structure in your soil, allowing for great air ventilation and more water retention.
Lime - makes soil more alkaline (less acidic) so in areas where you soil's pH level is less that 6.5, lime is added to reduce the acidity. Most plants enjoy growing in soil that is between 6.5 or 7.0 pH, but there are a few like very acidic soil. (For instance, we will be planting blueberries, which prefer to grow in 4.5 pH - 5.5 pH level.)
Cover Crop - is planted to retain the nutrients in the soil during the winter months. In the spring, this crop will be plowed down and we will plant our vegetables/fruits as normal.
For now, we are focusing on completing the garden and anticipate having the cover crop planted by Sunday. After that, it's on to another item on the list.
Stay tuned to learn how our Solar Power System is upgraded, installed and if it works or not!
Have a great weekend!
PEACE
Thursday, September 11, 2008
Take Two - no, seriously
It was brought to my attention that my previous entries don't really reflect....ME. I haven't done a very good job of explaining myself and what I'm doing because I have been so concerned with "appearing" a certain way. I didn't want to share too much, didn't want to not share enough; I didn't want to do this or that...but the long and short of it is it doesn't really matter 'cause I'm throwing all of these self imposed rules out of the window and I'm going to start fresh and hopefully, successfully portray the adventure that I am currently in the midst of.
So here we go again, take two I guess you could say.
I grew up in New Orleans, Louisiana and loved it. That city is so deeply integrated into who I am as a person that I cannot even fathom the type of person I would be without all the chaos, love, soul and general appreciation for life that I associate with the city. It is truly a magical place that is not fully appreciated until you've stepped out of your tourist shoes and just explored. It's just amazing!
But while my soul is in New Orleans, my love was in Idaho so off I went, literally onto the unbeaten path. I got an amazing job opportunity, found a cute apartment and quite my old job at an engineering firm. Between my love, the job and the apartment, it was if the stars had aligned and this was it for me, the next step in my big adventure.
So we battened down in my Tahoe: a Uhaul trailer and two dogs were our companions and off we went. 2372.57 miles later, we arrived in Moscow to snow, ice and the realization that I'd just moved 2000+ miles north, to the land of snow...SNOW...we arrived March 26 and it was snowing. I'd traded my Hurricane days in for Snow days and there was no time to adjust.
Several months later we casually went to view a solar power system in real, working order. About a month later, we purchased 21.5 acres on Moscow Mountain, about 5 minutes outside of Moscow. (And in case you didn't put it together, yes, it is the same home that contained the real, working solar power system.)
Our overall goal for the land is to keep it completely off the grid. This means we want to become completely self-sustaining, i.e. carbon neutral.
At the moment, we are a long way from that {being carbon neutral} but it's an on-going process that we are pretty much discovering the path to as we go. And that's okay.
I hope to use this website as an outlet for what we discover, and as I said in a previous entry, a forum for input, suggestions, comments, etc.
With that said, let this be the first "real" entry. From here, we start a new, fresh, clean slate where I will essentially reveal the good, the bad, the ugly and everything in between. This is a brand new adventure that all of you probably know as much about as I do so here we go, together, into "the great unknown" and hopefully, we'll all come out a little wiser. Or if nothing else, a hell of a lot dirtier.
Thank you for everyone who has been following along so far. I hope that things only get better! PEACE.
Wednesday, August 27, 2008
ATTACK of the Lady Bugs - AAAHH
Needless to say, with all of the work we have been doing on the property, we've discovered some welcome residents! Check this out:
So it turns out that Lady Bugs nest on Moscow Mountain and our property appears to be the perfect location. We didn't notice them at all until we cut a few trees down to clear some of the area we are currently developing into garden. Now, they are literally everywhere.
No worries though; it's a good thing! The Lady Bug's favorite meal is the Aphid. An Aphid is a small insect that munches on the sap of plants, i.e. not good for your garden. Not only are Lady Bugs great guardians for your garden, but they are also considered a sign of good luck and good fortune. And on top of all that, if we were bothered by them, we could actually sell them to local nursery's.
Around 2 o'clock everyday, it warms up enough for the bugs to start flying and swarming. It's pretty wild to see! Just a huge floating red cloud. The only negative is that they do bite though apparently, I'm the only one they bite. It feels just like a tiny pinch, nothing too bad, just gets annoying when you are surrounded by thousands of them.
Hey, if that's my biggest complaint then I think we're doing pretty good! :-)
If the weather lets up, we are hoping to dig out the back of the house to add another layer of sealant and visqueen. This will also be the first step towards our Rain Water Catchment system so fingers crossed, we will be collecting our own water by week's end.
PEACE.
Tuesday, August 26, 2008
Another One Bites the Dust
That's all she wrote at the moment but I'll be back with some crazy pics of the creepy-crawlers that are taking over. The more trees that go down, the more we discover...
PEACE.
Tuesday, August 19, 2008
And the Beat Goes On
This is a picture of the "Lake House". It overlooks the pond, which when full, is about 10 feet deep. At the moment it's probably standing around 5 feet but it's pretty stagnant; we are currently weighing our options for the best way to ariate the pond all year round. Torn between purch
Here's the sauna. Nothing too fancy. Stays nice and warm so I'll probably be hiding in here through out winter. Can't figure out what the skeleton is of; it appears to have a pelvic bone where I would assume a skull would be...not very good with skeletons though. Any ideas?
Thursday, August 14, 2008
Let me Introduce Myself and Our Plan
After 2 months of jumping through hoops, shaking hands and even a few tears, we have finally purchased 21.5 acres right outside of town. The property is considered to be completely off the grid. FINALLY! We closed last Friday and have immediately begun construction to make the property as efficient and self-reliant as possible before winter sets in. It's a lofty goal to get this place set up in time, but we're hoping to at least have a reliable power source, water source and the beginnings of our garden and/or greenhouse before the first snow hits the ground. (I hear that can range from mid-October to December but that snow is inevitable...)
The purpose of the blog: to provide a public outlet that shows how realistic and easy (or difficult) it really is to transition from living completely on the grid to living completely off the grid. I will be blogging about pretty much everything from my personal discoveries to the construction projects on the property. I will post ideas, resources, photos, recipes, music, pretty much anything and everything that I learn as we navigate this adventure. And I'm hoping that by doing that, maybe I can encourage a few of your to personally embrace the green movement, whether it be something as simple as seeking out your local recycling center or something as impressive as purchasing an electric car.
In my opinion, renewable resources are the wave of the future, one way or the other. So I am merely attempting to illustrate and give a real life example of how two people determined to make a difference, really can, even if it's only in their everyday lives.
My initial entries will probably be pretty sporadic as we still don't have reliable Internet at the property. In saying that, I urge all of you to be active members of this blog community and comment, share ideas and your opinions. That said, I do ask that you leave the negative, personal stuff out. This is going to be very difficult, there's no denying that, but it's an experience that I would really like to share with whomever is interested in an uninhibited, positive manner. And ask that in making your comments, you keep the positiveness flowing. i.e. Be Nice or Go Home!
Okay, now on to the general plan for the property. What we did was purchase this acreage that already had a minimal solar power system in place, 2 cabins, a creek, a pond, and tons of potential. We are upgrading the solar power system ASAP, but currently we have a 5 watt solar panel set up, which has proved to be more than enough to provide us with enough power to charge our cell phones, my laptop and most importantly, keep the ipod player going. We also have a 700 watt inverter and an older battery bank. All of this will eventually be recycled to the smaller cabin.
Tomorrow we will be meeting with a consultant who will advise where to place our new, larger solar panels and how to set up our solar power system to also be compatible with a micro-hydro power system. We are choosing to do both solar and micro-hydro for a number of reasons, with the primary reason being that we will eventually be running appliances off of this power system and will need a large amount of power available. Another reason is that we are currently storing power for the second cabin at the primary cabin. And yet another reason is why not? Why not utilize both the sun and the creek? The creek runs 9 months of the year and the sun, well it's out all year round though the amount of time varies with the seasons.
Currently, we are also working on the beginnings of our garden. The flat ground in front of the main house is in the process of being terraced out (into 2 terraces) that will be supported by a rock wall.
We are building this ourselves. The rocks are free; they are located on family property. The labor is also free; it's us and we can't pay ourselves, well not yet anyway. So total cost will come down to the gas to drive out and pick up the rocks, and food/water that I had to purchase to keep everyone hydrated, full and as happy as possible.
The pictures show the progress we made on the wall in a morning.
Starting at the far left, you can see how we cleared the brush, put the dirt
down and began the base of the first level terrace for the wall.
Once we finish putting up the walls, we will put down dirt, followed by peat moss, manure and several other materials that are high in nitrogen, phosphorus and potassium. We will then plant Rye grass; once it's grown we will use a rototiller in the garden soil, add some compost and cover the area with either tarp or burlap to allow the soil to continue to "stew" until we are ready to plant starters in the spring. (Any suggestions for the best method to "protect" our soil from winter?)
All that said, we also going to try and get a greenhouse structure up before winter. This will not be started until we complete the terraces for the outdoor garden, but we have picked out a basic structure. Our design is based off of a solar green house; the north facing wall is a solid wall and the south facing wall is your "absorbing" wall. Our north facing wall will be recycled cinder blocks (possibly filled with Styrofoam) and the south facing wall will be glass. We chose a solar green house because of how severe the winter's in the mountains of Idaho can be (though I wouldn't know...yet...).
For right now, that's all I've got. But I'll be back.
Peace.